
We had planned out 11 different stops, but on the way we were lucky enough to find others near our planned destinations, so we probably ended up going to 17 or so. I was exhausted by the end since we were out for 7 hours (with a stop to Hancock Fabrics and Chick-fil-a) but it was so worth it, we found tons of great stuff!!

A cute decorative box that is now sitting on top of my kitchen cabinets.....

some fun pictures of different veggies to hang in my kitchen.....

some shirts for myself that I found for $0.50 each (!!)...

 |  |

....and one of the best finds - a Little People barn for Haley that we found for $2.00!!
She LOVES the little barn, it makes sounds when she opens the stable doors and presses other areas on the barn. Unfortunately, the set didn't come with a horse so as you can see, her My Little Pony is standing in for now. I also found 2 shirts for the hubby ($1.00/shirt - brand new!) and packages of Pampers diapers for 1/3 the price I would normally spend at Sam's Club. The total amount I spent was about $35.00 for everything. I'm never shopping at another store again (until next week anyway.)
What fun things have you found while garage saling?
Tuesday, June 22, 2010
The verdict is in!!
Even though I'm only 14 weeks and 4 days, the ultrasound tech was very sure of the gender. To quote her, "oh it's definitely a boy" so that makes me feel better knowing I can go out and buy lots of boy things without wondering if she was making a wild guess about the sex. I have no boy-themed fabric, what am I going to do? I guess this is a good excuse to go shopping at Hancock Fabrics :) I mean after all, the little boy needs a Steelers themed room, right? Right.


The name is yet to be finalized, but we're leaning towards Connor Lee (Lee after my husband's dad). I don't know, I guess nothing jumps out at me like the name Haley did.
Care to throw out some suggestions? No fruits, vegetables, or names you would give a puppy, the kid has to go to school one day.
Saturday, June 19, 2010
Pocket bib tutorial
Introducing the Dollar Store Pocket Bib!

You'll need:
- Vinyl tablecloth with flannel backing - don't get the kind without the backing, they're usually too thin to work. I got mine from the Dollar Store
- 3 inches of velcro and backing
- Double-sided bias tape (or you can make your own with scraps like I did)
- A bib to trace for your pattern
 |  |
Once you have your bib traced, cut it out carefully, making sure not to tear the vinyl. For my bib, the Dollar Store table cloth was too thin, so I had to cut out 2 bib shapes to make sure my bib would be sturdy enough.
Next, place your sample bib down on another piece of table cloth and trace around the pocket area, making sure to leave 1/2 inch or so extra on each side of the bib (you want the pocket to be quite a bit larger on the sides because it needs to poke out some to catch the falling food.)After tracing, cut out carefully.

Now, you need to line the top of your pocket with some bias tape. If you don't have any, you can always make your own by measuring the top of your pocket and cutting a 2" wide rectangle of fabric. Fold the fabric down the middle and iron in half, wrong sides facing, then open the fabric and iron each side in half wrong sides facing. You should have something like this:

Tuck the top of your pocket into the cleft of the bias tape and sew a straight line across, encasing the bib in the bias tape like this:

Now, pin your pocket onto the right side of your bib pattern, making sure the shiny part of your bib is on top (and if you had to double up on your bibs for strength, place your 2 bib patterns together, wrong sides facing and then pin the pocket on top). Next, take your bias tape and line it all around your bib, making sure to pin it on well. If you have trouble lining the bias tape around some of the corners of the bib, clip the inside of the bias tape a little bit where it meets the corner so the tape can curve better. Sew in a coordinating string color around the entire bib, making sure to backstitch where you begin and end to anchor your stitches.

Last, cut out 3 inches or so of velcro and backing. Pin the hook part of the velcro (scratchy side) on top of your bib on the left side (where the baby's right shoulder would be) and sew securely around. Attach the loop part of the velcro (soft side) on the back of your bib to the neck strap (see below).

And you're done! Now all you need is a baby to put it on. Luckily, I happen to have one of those :)

Enjoy your mess-free meals! Well, less messy anyways :)
Monday, June 14, 2010
Oh what a weekend

Snuggled on the couch and watched lots of Dora the Explorer and Spongebob (I had to stay glued to the couch with her or else she'd cry, needless to say the "Backpack" song was stuck in my head all day)...

Read "Baby Animals" about 20 times. She should be a pro at what sounds baby animals make after that marathon...

Typed on the keyboard her Yaya and Papa Bear gave her...

And blew lots of "bub-o's." Look, I got a smile!
Saturday, June 12, 2010
It's a snap!
Yeah, those old clothes.
I have a bag of those too. They're mostly odd t-shirts or sweaters that haven't seen the light of day in a looooong time. I dug into that bag a week ago and realized something. Even if I don't like a shirt, why not make it into something I DO like? Novel idea, huh?
Prudent Baby has a ton of great tutorials for kids and babies from clothes to t
 oys and books. It's one of my new favorite blogs! I found a great tutorial for the "Snappy Toddler Top" and modified it some (they have a downloadable pattern on their site too, which really helped.)
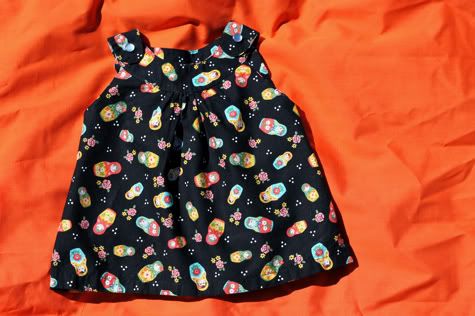
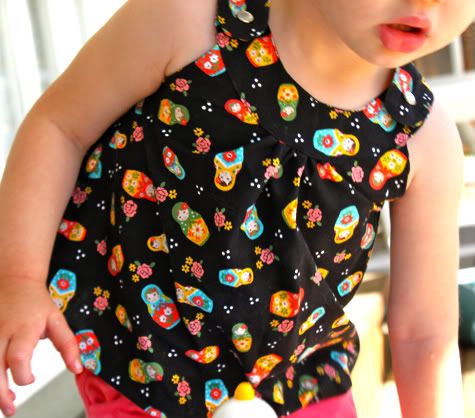
Here's a few pictures of how my shirt turned out. (Sorry if some of the pictures are kind of blurry, I caught my little model in the middle of play time :)


So dig out those old clothes and see what you can make!
Thursday, June 10, 2010
Crayon roll

I've wanted to make one of these for awhile (even though my daughter would rather eat the crayons than color with them), so when I found this tutorial and had the exact amount of flannel that I needed left over from my recent blanket-making escapade, I decided to try making one myself. Here's how it turned out:
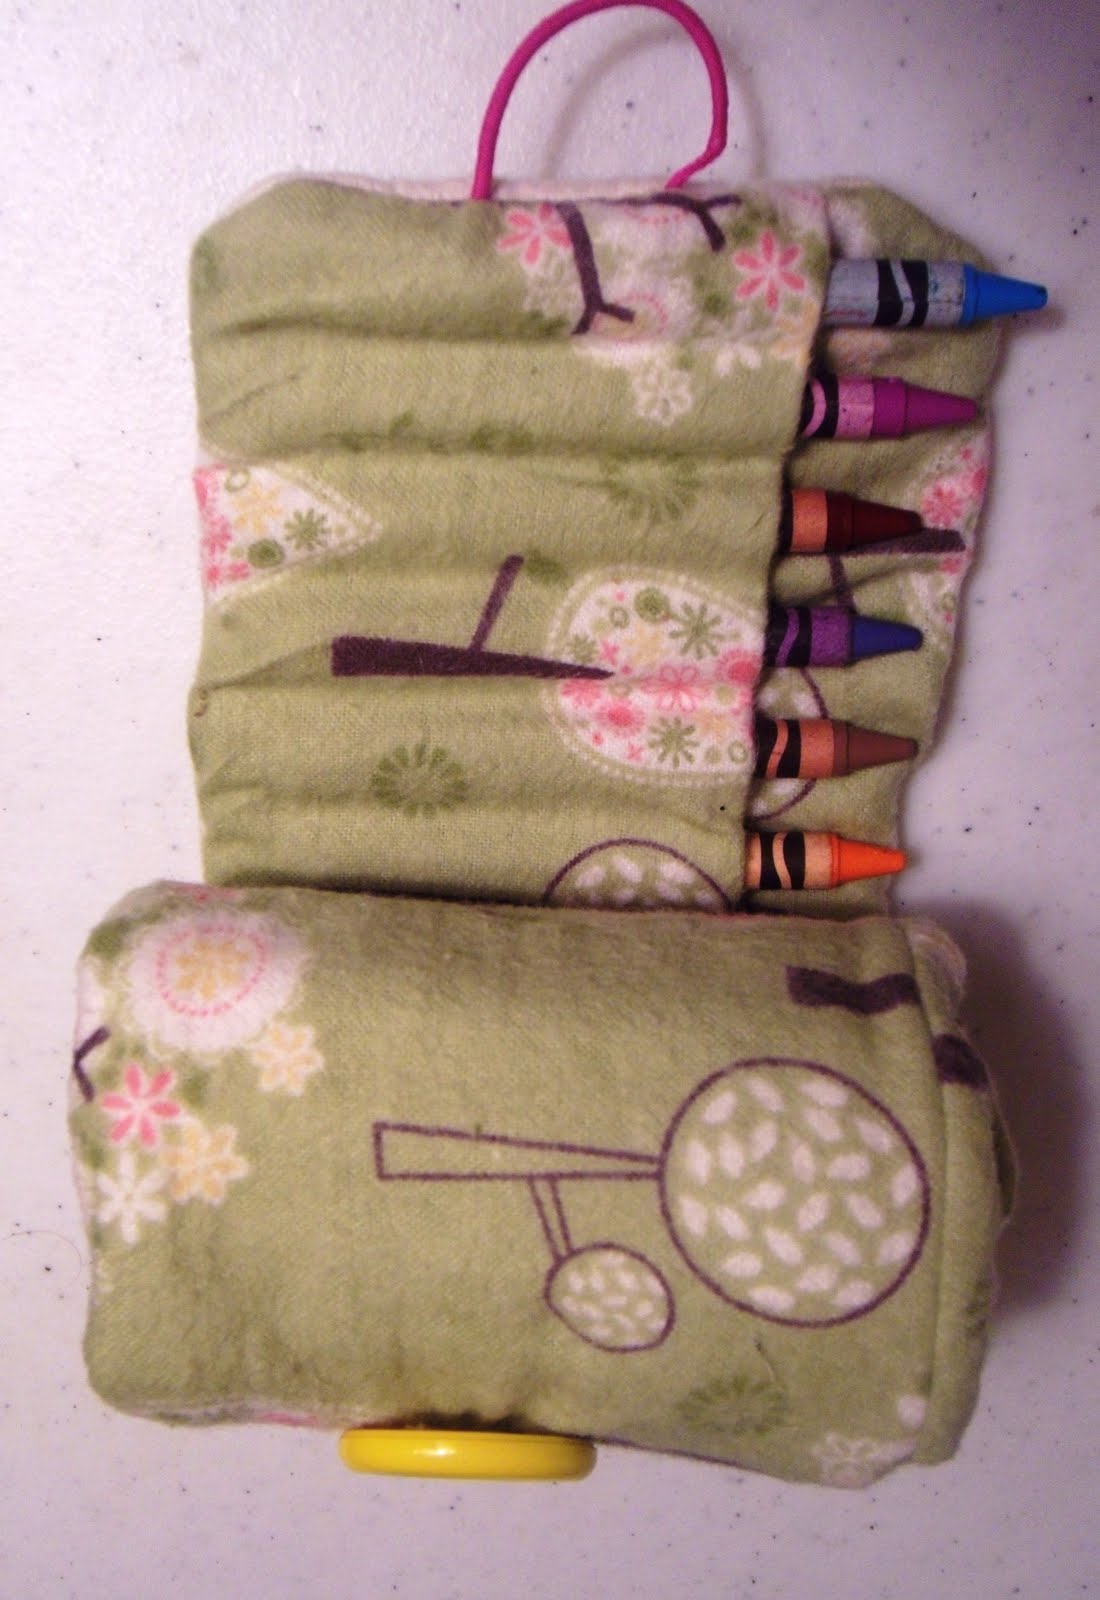
 This is such a cute project, and so easy! It took me about 1 1/2 hours to do, and I think it'd be faster if I tried making another one now that I have it down. The roll holds about 29 crayons (odd number?) which is plenty for a kid who needs some variety when coloring. The best part about the crayon roll is that it's portable (and personalized!), and there's no more loose crayons in the car/diaper bag/purse. All of them are displayed for you or your little one to choose whatever color you need, then easily stored for another day.
I love this project, too bad Haley doesn't get the whole coloring thing yet....the crayon roll will be waiting for her when she finally gets it down!
Wednesday, June 9, 2010
Silky blankies
My little 5 month-old niece, Lena, is now at the age where she is grabbing onto everything in sight, so my sister-in-law wanted to know if my cousin was still selling the blankets on her Etsy shop. After going online, I realized that she had closed her shop, but I thought it would be an easy enough project to tackle myself.
I went to Michael's and found 2 adorable patterns (1/2 each) and some pink satin material (1 yard.) I also picked up a few assorted ribbons to attach to sides of the blanket to give Lena something to play with as she cuddled with her blankies. After some measuring and pinning, I came out with 2 adorable blankies, and fabric to spare! I'm hoping a few pregnant friends of mine have girls so I can make some more :)
 |  |
Tuesday, June 8, 2010
T-shirt refashion


 After finishing sewing and lining the shirt, it didn't seem quite finished. I knew I wanted to add an embellishment to it, so I decided to make a cute flower decal, but I didn't want it to be typical. I started by tracing a pattern for a petal. I cut out 8 flower petals and lined them up in pairs, overlapping the edges some. I then took a needle and thread and sewed all of them together by sewing several small stitches on the bottom (flat part) of each petal. After they were all joined together, I pulled the thread and all of them bunched up nicely. Then, join the ends of the end 2 petals by making a circle, and make a couple of stitches to join the 2, like this:
From there, I pinned the flower to the tank top, sewed around the entire perimeter, then added a large button in the middle to finish it, and voila! Instant cute baby tank! The entire project probably took me about 4 hours, but it took a little longer with constant interruptions thanks to bedtime and an active toddler. I am so happy with how this turned out though. I will never throw another t-shirt out again!

Monday, June 7, 2010
More stackable rings
If Haley had stackable rings, Lena needed some too. Many people don't realize that, when babies are young, they don't see the full color spectrum for a few months. They like to look at the colors red and black the most because they have the best contrast, making them the most interesting. Luckily, I love fabrics in black and red, so I had a bunch to work with.

 |  |
I hear that Lena loves the rings and gnaws the living daylights out of them. If anything, they make great teething rings!
Sunday, June 6, 2010
Happy 12 weeks!


Saturday, June 5, 2010
Black Apple dolls
 craft came back with a vengeance (as you will see over the next few days :) After browsing through the awesome (and easy!) crafts on Martha Stewart's website, I found this adorable pattern to make a Black Apple Doll, and knew that I had to try it. It was kind of perfect timing since a friend of mine had a daughter who was turning 4 today, so it was pretty much a sign that it was meant to be :) After I finished the first doll, I had to make a second for another friend with a little girl who will be turning 4 in 3 months. Now, I'm kind of addicted to this project and will probably end up making a whole family for Haley and Baby #2 in the next few weeks.
For someone who has only ever made maybe 2 stuffies, this project was really easy, AND I didn't have to buy anything extra. I already had a bunch of loose fabric and scraps sitting around. and the only other thing I needed was stuffing and acrylic paint for the face (which I already had as well.)
 I think she came out really well for my first try! The head is a little square on one side where I had to whipstitch the head closed after I stuffed the doll, but besides that, I'm really happy with her. I half expected the first doll to turn into some kind of lumpy monstrosity, but seriously this project was so easy and it's great for gifts. And, I just love the little smirk and rosy cheeks on her face :) This is also a really great project to personalize. I added the flower in her hair and a little pocket on her dress. If I was feeling more adventurous, I would have tried to make her some jewelry or little boots, but I didn't want to ruin a good thing.
Now I have to see if I can wait 3 months to give my other friend's daughter her doll....ugh, I don't know if I can wait, I'm terrible with surprises!
Friday, June 4, 2010
Tubes
I told you in an earlier post about how Haley has had problems with her ears for months and how she has been on a ridiculous amount of antibiotics to clear everything up. Unfortunately, the ear problems have continued (despite 5 rounds of different antibiotics and a set of shots) and she had to have surgery to get tubes put in her ears yesterday.
While I wasn't looking forward to my daughter going under the knife, I just wanted all of her sickness and ear problems to go away finally. She's been such a trooper through all of the sickness she's been dealing with lately, I don't know if I would be able to handle everything as well as she has. After taking her to a specialist, the doctor told us that Haley didn't have ear infections, but that she had a ton of build up fluid and general yucky stuff built up in her ears that was making her hear as if she's hearing under water. I had been wondering why she had suddenly stopped calling me "Mama" and started referring to me as "Baba" instead, and the doctor explained that that was how she heard "Mama" pronounced because of all the built up fluid.
So yesterday, I helped load Haley in the car with her pj's and blankie, and said my goodbyes as my husband took her to the hospital for surgery. I know getting tubes is a pretty standard procedure for kids her age, but the word "surgery" can be pretty scary sometimes, especially when it's concerning your child.
I had to pick my mother-in-law (who Haley calls "Yaya") up from the airport as Haley was having the surgery, but my husband called right after to let me know that the surgery went well but that Haley was confused and groggy from the anesthesia. It was hard to hear her pitiful cries in the background, but good to know that everything went well and that the ear issues are (hopefully) cured for good.
Haley stayed home with Yaya yesterday and today so that she can recover in her own bed in the comfort of her own home. I know beyond a doubt that she's getting spoiled completely (she already got a bag of clothes from the family in Pittsburgh - thanks guys!). She's been sleeping a lot the past couple of days, which is expected, and while she's still been very clingy and whiny, I know she'll be back to her normal, happy self any day now.
She even called me Mama this morning :)
